Custom Dreambooth Training For Stable Diffusion
The ML image synthesis topic has always been interesting, but it’s exploded since August this year, when Stable Diffusion was made open source, for anyone to try. Since then, I’ve been running a copy of Stable Diffusion locally on my NVIDIA 3070, using the WebUI from Automatic111.
I actually started out trying to get things working on my previous graphics card, a AMD 6700 XT, but the support and performance gap between CUDA and ROCm within the pytorch framework is vast, especially because I don’t have a dual boot system to natively use Linux, where support is much better. I ended up picked up a second hand 3070 and it’s been plain sailing, but only 8GB of RAM is a little restrictive.
Training on Google Colab #
A little while later, a paper was published by Google on a technique called DreamBooth, which allows for additional training and tuning of text-to-image models. People started implementing this on top of Stable Diffusion, but it started out slow and difficult to run on modest hardware.
In recent weeks people have been improving the original approach, finding optimisations to lower the time and hardware requirements. It’s reached a point where I wanted to try it out, so I ran the process with https://github.com/TheLastBen/fast-stable-diffusion/blob/main/fast-DreamBooth.ipynb.
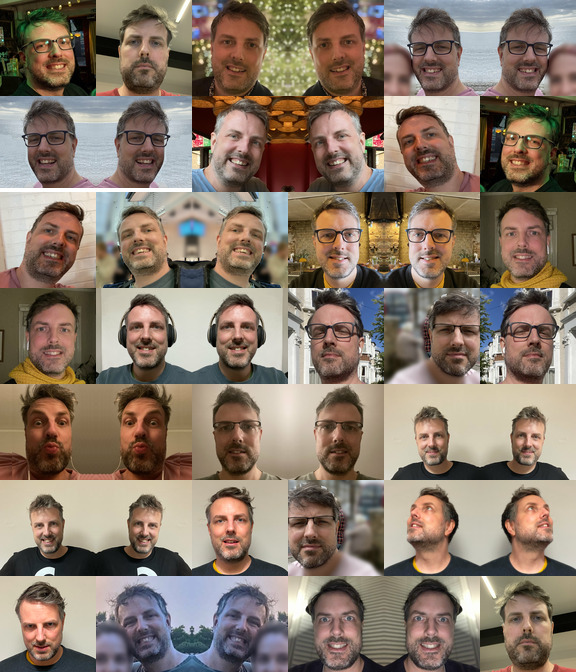
I assembled about 20 pictures from my photo library, cropped and blurred where appropriate, and resized to 512px square. I then supplemented them with a few specific photos I took against a white background, at various head angles. After reading some of the discussions, I also decided to run them all through convert <infile> -flop <outfile> to create horizontally mirrored copies. I don’t know if this step is required, but it’s what I chose, given training data is more important than additional training steps.
You must also obey the naming convention for these images, with the format <your-prefix> (%d).png, so I used the following bash script:
counter=1
for i in *.png
do
  cp $i "nickludlam (${counter}).png"
  let counter=counter+1
done
Which made each image conform to the format. I uploaded these to Google Drive, in a folder called DreamBoothTrainingImages/.
I also decided to pay for the instance. You can run it for free, but risk termination at any point, so the prospect of losing 3 hours of work was definitely worth the 3 credits I ended up using.
NOTE: I would actually add more variety to this if I went through the process again. In testing out prompts, it very strongly wants to focus in on my head, and it’s difficult to get images that show shoulders or upper torso. In order to make wider compositions more likely to be created, you need to train it with photos of similar poses.
Google Colab #
When running the notebook on Colab, there are a few buttons that need clicking, and prompts that needed filling in. Although the notebook is fairly well documented, not all of it was clear, so here’s a summary of what I entered into the page:
| Variable name | Value |
|---|---|
| Huggingface_Token | [copy from Huggingface] |
| Session_Name | nickludlam |
| IMAGES_FOLDER_OPTIONAL | /content/gdrive/MyDrive/DreamBoothTrainingImages |
| Contains_faces | Male |
| Crop_images | Unchecked |
| Training_Steps | [should be set according to their suggestions, but I found that this caused overtraining, possibly because of my mirrored duplicate images] |
I left everything else as default. The repo is being updated frequently, so double check everything you’re typing in, as things might have changed by the time you run this.
Training #
The training is split into two halves. First is the text encoder training, and then comes the unet training. For me, the first stage took about one hour, and the second stage about two hours. You’ll see an output like this:
Training the text encoder with regularization...
'########:'########:::::'###::::'####:'##::: ##:'####:'##::: ##::'######:::
... ##..:: ##.... ##:::'## ##:::. ##:: ###:: ##:. ##:: ###:: ##:'##... ##::
::: ##:::: ##:::: ##::'##:. ##::: ##:: ####: ##:: ##:: ####: ##: ##:::..:::
::: ##:::: ########::'##:::. ##:: ##:: ## ## ##:: ##:: ## ## ##: ##::'####:
::: ##:::: ##.. ##::: #########:: ##:: ##. ####:: ##:: ##. ####: ##::: ##::
::: ##:::: ##::. ##:: ##.... ##:: ##:: ##:. ###:: ##:: ##:. ###: ##::: ##::
::: ##:::: ##:::. ##: ##:::: ##:'####: ##::. ##:'####: ##::. ##:. ######:::
:::..:::::..:::::..::..:::::..::....::..::::..::....::..::::..:::......::::

Progress:|██████████████████       | 73% 2136/2940 [53:35<20:07,  1.50s/it, loss=0.476, lr=6.2e-7] nickludlam
The final step in the process is to convert the training data into a checkpoint file and copy it to your Google Drive. In this case, it’s:
My Drive/Fast-Dreambooth/Sessions/nickludlam/nickludlam.ckpt
Download this file and drop it into the models/Stable-diffusion/ directory inside your automatic1111 repository installation, and run the UI, and your checkpoint will be available in the top checkpoint dropdown.
Don’t forget to spin down the instance once you’re done!
Testing #
I experimented with a number of prompts based on some posts I found online:
- https://github.com/XavierXiao/Dreambooth-Stable-Diffusion/issues/4
- https://www.reddit.com/r/StableDiffusion/comments/ya4zxm/dreambooth_is_crazy_prompts_workflow_in_comments/
- https://www.reddit.com/r/StableDiffusion/comments/ygi228/prompts_for_trained_dreambooth_generations_of/
- https://www.reddit.com/r/StableDiffusion/comments/xu7cg8/using_dreambooth_to_create_art_of_anime/
- https://publicprompts.art/comic-art/
- https://lexica.art/
One of the biggest issues I had was finding the right balance between Sampling Steps, CFG Scale and word emphasis within the prompt. If one of the suggested prompts is the following:
photo of nickludlam as an astronaut, glasses, helmet in
alien world abstract oil painting, greg rutkowski, detailed face
I found that my net was overtrained, and would just repeatedly make images of the training data. One way around this was to emphasize the target words in the prompt. So for the above, you wrap key terms in round brackets to become:
photo of nickludlam as an ((astronaut)), glasses, (helmet) in
alien world abstract oil painting, greg rutkowski, detailed face
You can add more brackets for additional emphasis. I also tried many of the different sampling methods. It took a LOT of experimentation to get some nice images out, so be patient.
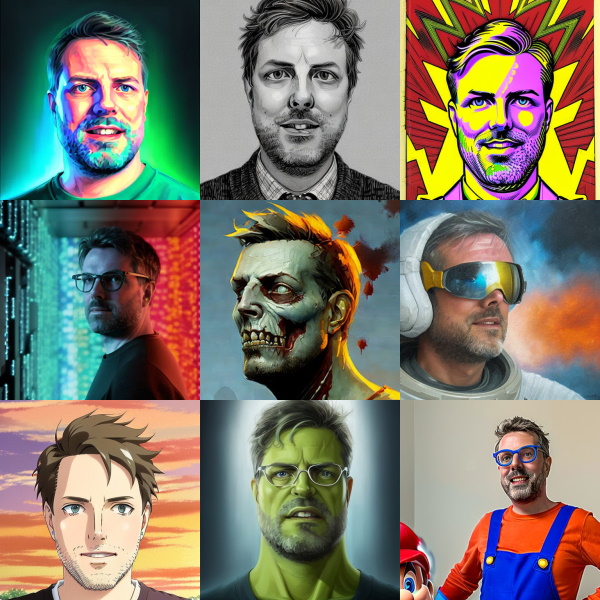
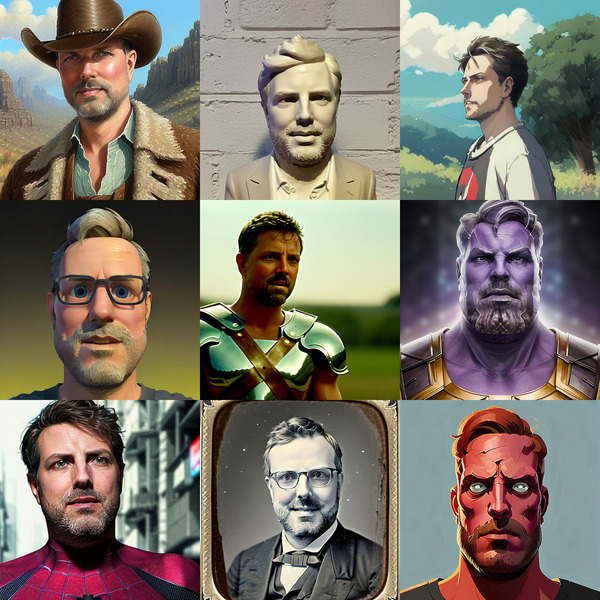
As you can see, I achieved some nicely varied results, given enough time and patience with prompt crafting.
Overtraining #
When attempting to use the newly trained checkpoint file, I often find that it prefers to give me results which just feature a head, even when I’ve asked for an image with shoulders or upper body. As mentioned earlier, I would definitely include more variety in the stance from the subject.
I’ve also seen my face present in a lot of other images of white males, even when my specific keyword is not in the actual prompt, which I believe is a strong indicator of overtraining.
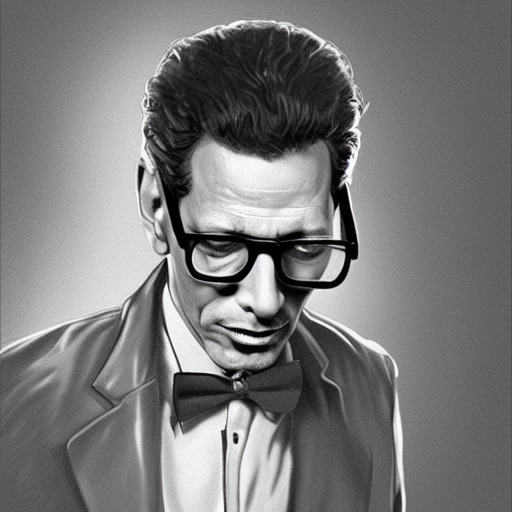
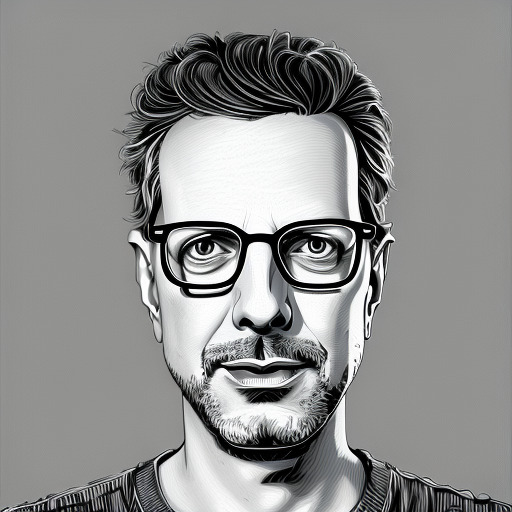

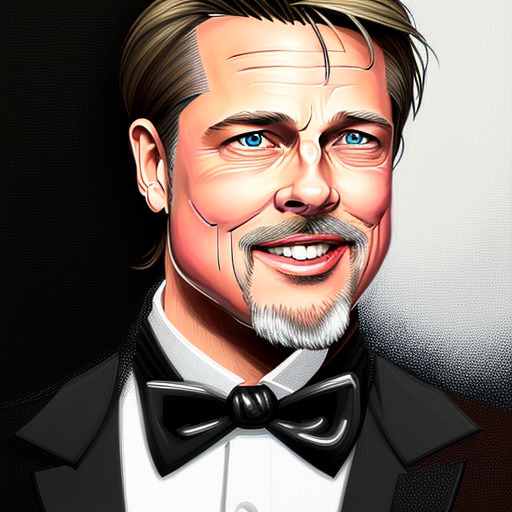
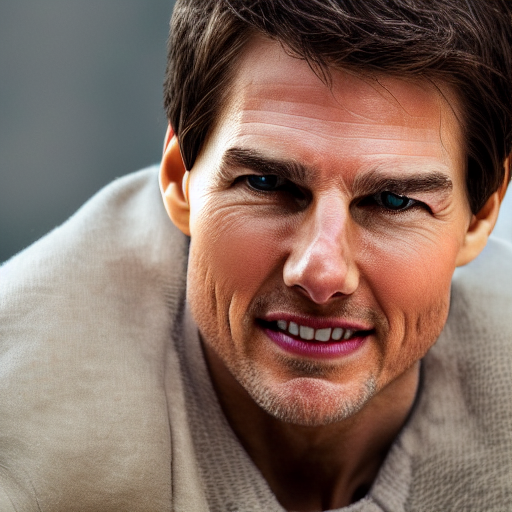
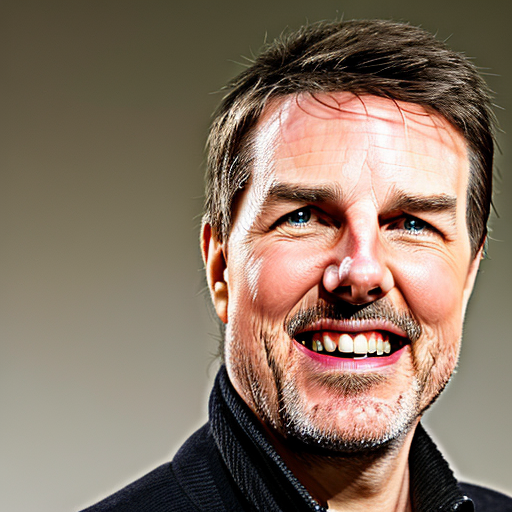
I tested this by using the same conditions for both checkpoints, for instance the middle one is derived from:
brad pitt wearing a tuxedo, portrait, highly detailed, digital painting, artstation,
concept art, sharp focus, illustration, art by artgerm and greg rutkowski and alphonse mucha

Steps: 30, Sampler: Euler a, CFG scale: 7, Seed: 3120218309, Size: 512x512
Conclusion #
Overall I’m really happy with the results I can get, but there are parts of the process I’d do differently next time.
Firstly, as mentioned above, there was not enough variety in the training data. Having photos where I’m further from the camera is important. Some full-body and upper torso shots would help with the variety and creativity of prompts.
I’m also unsure whether using flopped images is as necessary where you’re effectively symmetrical. It is likely still useful where you’re looking to the left or right, where a horizontally flipped image will look sufficiently different. This wouldn’t work if you have facial features like moles or anything else which would be obviously flipped too.
I would also take advantage of the ability to test checkpoints and resume additional training as desired. That way you can stop when the results are at the right balance between accuracy of rendering your likeness, but yet it retains creativity in composition.
Other writeups #
There’s a very detailed writeup of the same process on bytexd.com, and an additional writeup from huggingface that goes into the differences between this technique and the original textual inversion, and lots of images showing the effects of different learning rates.